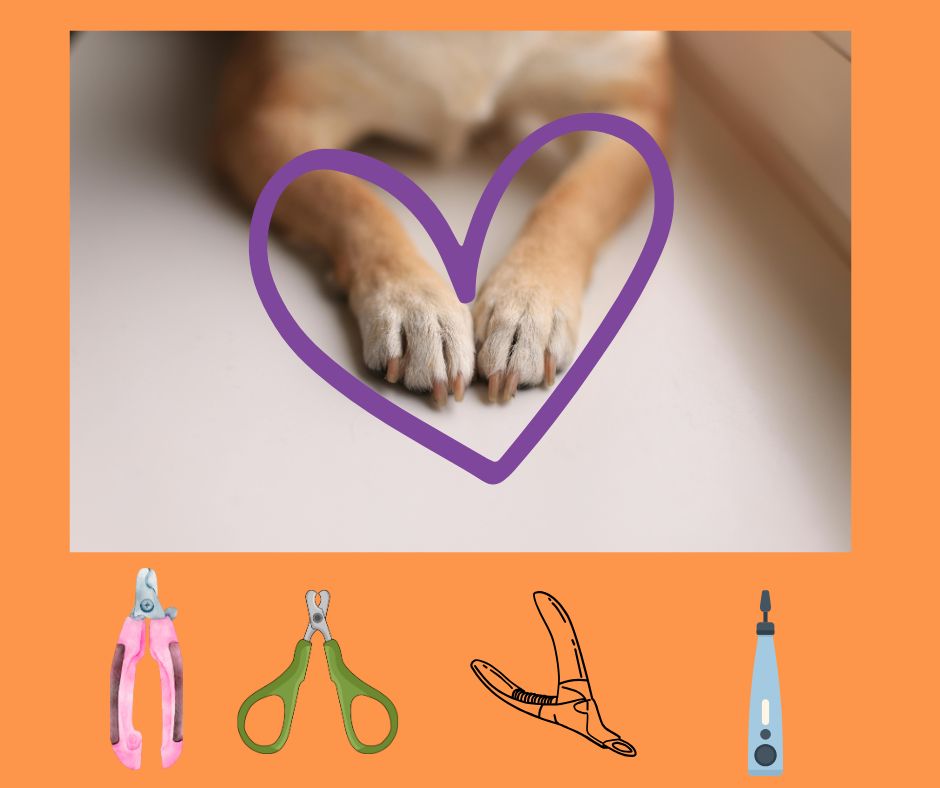
Trimming your dog’s nails can be a daunting task for many pet owners. It’s one of those things that, if not done regularly, can cause discomfort or even health problems for your pup. But don’t worry – with the right technique and a little patience, you can make nail trimming a stress-free experience for both you and your dog!
In this blog, I’ll walk you through everything you need to know about trimming your dog’s nails safely and confidently, step by step.
Why is Nail Trimming Important?
Regular nail trimming is important for your dog’s health. Overgrown nails can lead to:
- Pain: Long nails can cause discomfort, making it harder for your dog to walk.
- Injury: Dogs with long nails are at a higher risk of breaking or splitting them, which can be painful and lead to infection.
- Posture Issues: Overgrown nails can affect your dog’s posture and gait, causing issues in their joints or spine.
- Hygiene: Long nails can collect dirt and bacteria, potentially leading to infections.
What You’ll Need:
Before starting, make sure you have the right tools on hand:
- Nail Clippers: There are two common types – guillotine-style and scissor-style. Choose one that feels comfortable for you to use.
- Styptic Powder or Cornstarch: This is useful in case you accidentally trim too much and cause bleeding.
- Treats: These are essential for positive reinforcement!
- A Calm Environment: Find a quiet, well-lit space where you and your dog can both feel relaxed.
Step-by-Step Guide to Trimming Your Dog’s Nails
Step 1: Get Your Dog Comfortable
Start by making sure your dog is relaxed. If your dog is nervous, try spending a few minutes simply holding their paws and giving them a gentle massage. Speak confidently to reassure them and offer treats to build a positive association with the process.
If this is your first time trimming their nails, you might want to start slowly by handling their paws over a few days before you actually trim them.
Step 2: Choose the Right Time
Pick a time when your dog is calm, like after a walk or playtime. Avoid trimming nails when your dog is hyperactive or anxious, as this might make the process more difficult.
Step 3: Inspect the Nails
Look at your dog’s nails closely. You’ll want to avoid cutting the “quick” – the pink area that contains blood vessels. If your dog has dark nails, this might be harder to see, so be extra cautious. Light-colored nails make it easier to spot the quick, as it’s the darker area in the center.
Step 4: Start Trimming Slowly
Take the clippers and gently squeeze the handle to trim a small amount of the nail at a time. Don’t rush! It’s better to trim little by little rather than cutting too much in one go.
If your dog has long nails, you might only be able to trim a small portion during each session. Don’t worry – this is normal and will help your dog get used to the process over time.
Step 5: Handle the Quick with Care
If you accidentally cut too close to the quick and cause bleeding, don’t panic! Simply apply a small amount of styptic powder or cornstarch until the bleeding stops. Make sure to stay calm and reassure your dog that everything is fine.
Step 6: Take Breaks and Reward Your Dog
Nail trimming can be stressful for some dogs. If your pup gets anxious or wiggles too much, remind them in a confident voice that they are “fine”. If they are too scared or panicking take a break. Give them positive reinforcement for staying calm, and remember, you can always split the task into multiple sessions if needed.
Step 7: Repeat Regularly
Trimming your dog’s nails doesn’t need to be a one-time ordeal. Try to trim your dog’s nails every 2-4 weeks to keep them at a healthy length. With consistency, your dog will get used to the process and may even look forward to it!
Start to Finish Photo Examples
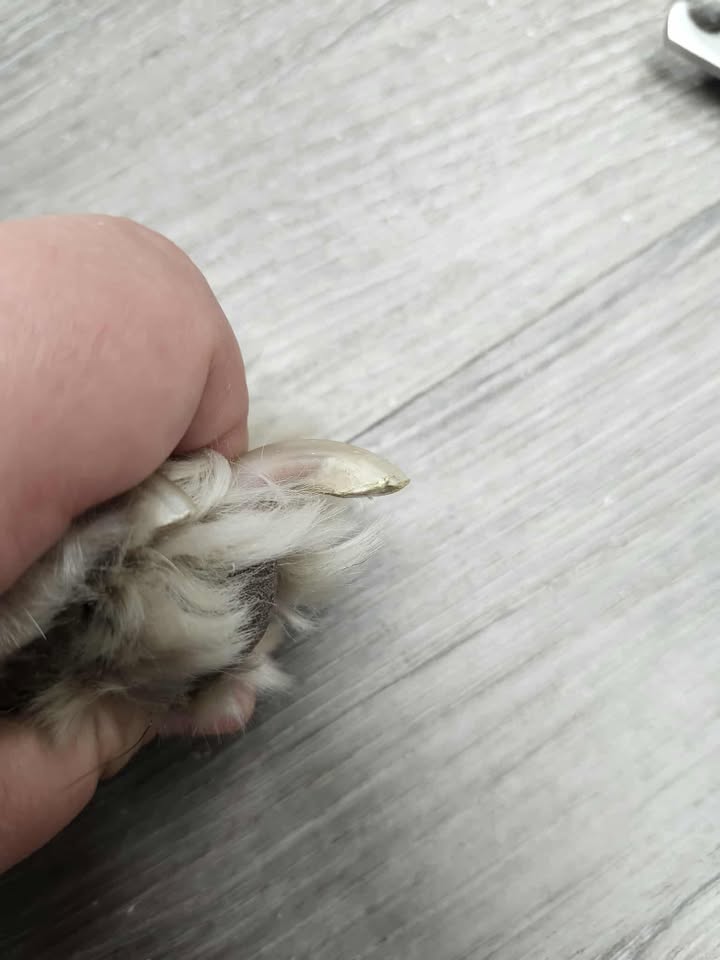
Photo 1: See the pink ‘quick’?
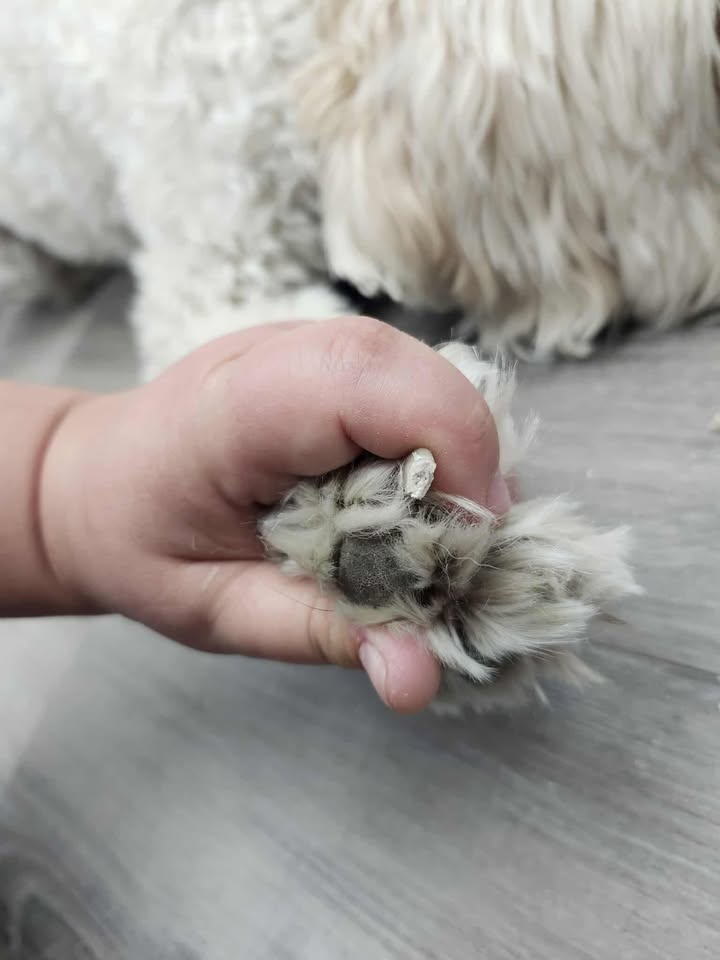
Photo 2: Good Start- Needs more trimming!
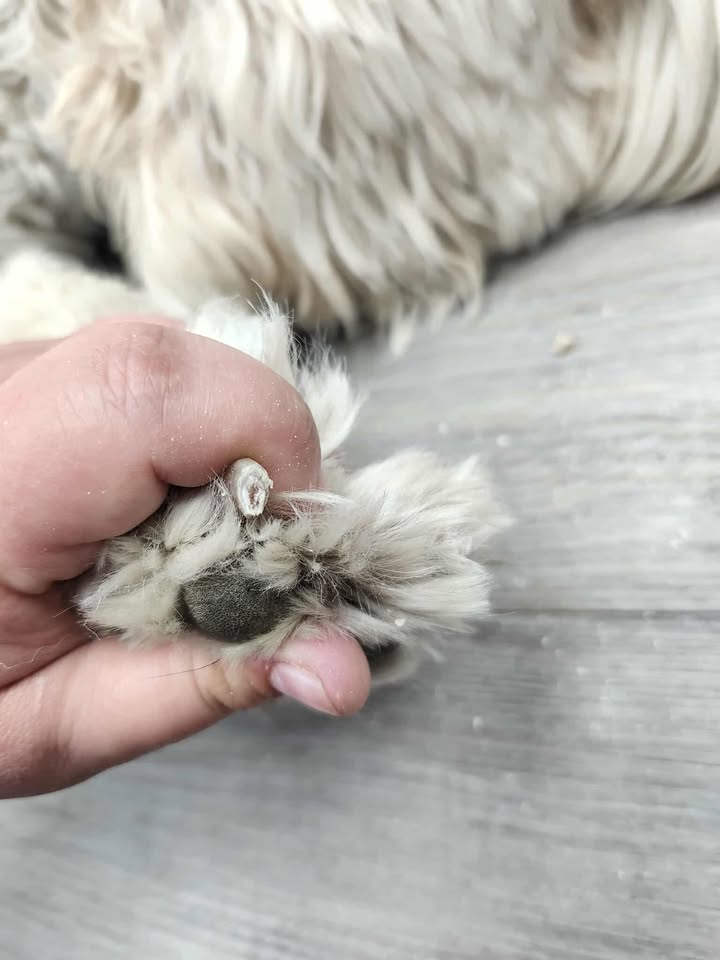
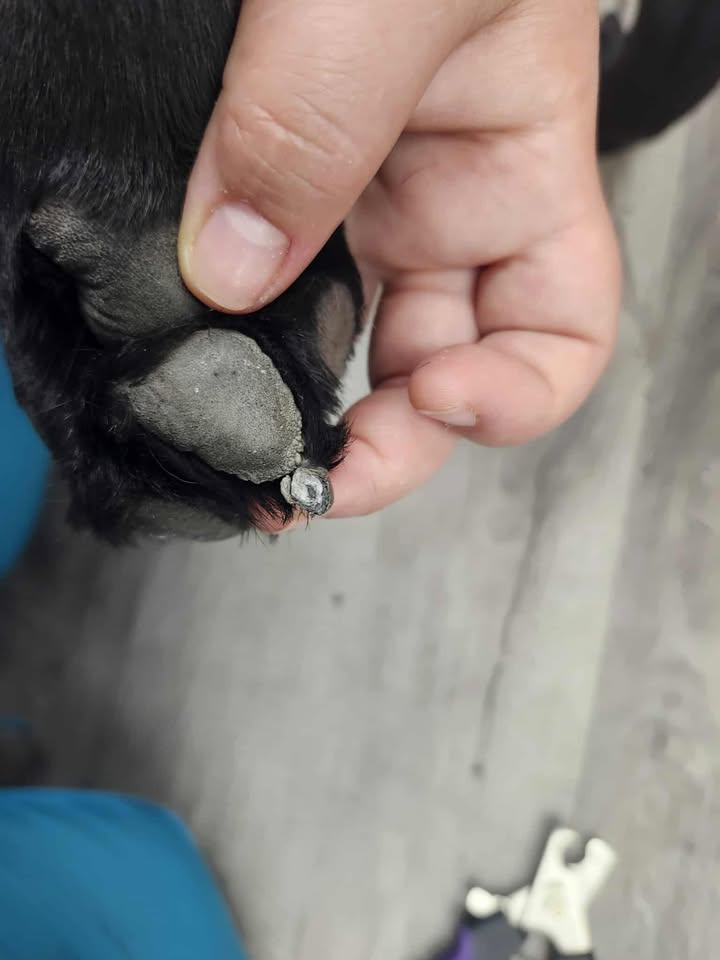
Photo 3: See the dark circle in the center? You are done!
Photo 4: Black nail for comparison.
Tips and Tricks for a Stress-Free Experience
Take It Slow
If your dog feels anxious or uneasy about nail trimming, take a deep breath and start slow. There’s no rush. Begin with just one or two nails per session and gradually build up to a full trim over the course of a few days. The goal is progress, not perfection, and each small step helps your dog feel more comfortable with the process.
Desensitize Your Dog Early
The earlier you start, the easier it becomes. Begin handling your dog’s paws as a puppy so they get used to the sensation. Gently touch and hold their paws while offering praise and treats. This sets the foundation for stress-free trimming sessions down the road, and your dog will come to trust the process more and more.
Enlist Help
If your dog is particularly nervous, don’t hesitate to ask for help. Having someone hold them gently but firmly can make a huge difference, especially if they’re squirming or trying to pull away. A little support can turn a tense situation into a calm, controlled one. Be wary that this is not always helpful if your pet is too scared.
Use Positive Reinforcement
Make nail trimming a rewarding experience for your dog. Keep things upbeat and light—praise them after every successful trim, and offer a treat to create a positive association. Over time, your dog will start to look forward to their nail sessions because they know something good is coming!
Pro Tip: Nail trimming is also a great opportunity to bond with your dog while checking for other health signs, like sore spots or unusual lumps. It’s a win-win!
Common Mistakes to Avoid
Cutting Too Much
Don’t worry if you’re unsure about where to cut. It’s always better to trim a little bit at a time than to risk cutting too much. The quick (the pink part inside the nail) is sensitive, and cutting into it can cause pain and bleeding. Play it safe, and trim gradually. Your dog will appreciate your cautious approach.
Skipping Regular Trims
Life gets busy, but skipping nail trims can lead to some uncomfortable—and sometimes dangerous—issues down the road. Overgrown nails can hurt your dog’s paws, affect their gait, and even lead to infections. Staying consistent with trims, every 2-4 weeks depending on their needs, will save you both stress in the long run.
Not Using the Right Tools
Using the wrong tools can make the process harder for both you and your dog. Invest in a quality set of nail clippers or a grinder that’s appropriate for your dog’s size. The right tools make all the difference, ensuring a clean, smooth cut and a less stressful experience.
Alternatives for Dogs That Hate Nail Trimming
If your dog absolutely refuses to cooperate with nail trimming, don’t worry—there are options:
Professional Grooming Services
Professional groomers are experienced with dogs who might not be too thrilled about nail trims. They have the tools and techniques to make the process quick and stress-free, and many dogs find it easier to let a pro handle it.
Veterinary Assistance
If trimming your dog’s nails at home is simply not an option, your vet can help. In some cases, your vet might be able to sedate your dog for a thorough nail trim and avoid the stress altogether.
Are you feeling more confident about tackling your dog’s nail trims? Don’t worry, with time and practice, you’ll both get into a comfortable rhythm. And remember, you’re doing an amazing job caring for your pet!


Leave a comment